| Latest topics | » Francis Shirley Russell 14th Hussars Today at 12:20 pm by IntCorpsMedals » Looking for the medal to 1423 Pte. W. Gregg/GreigSat Apr 27, 2024 1:46 am by sam steele » 1409 Pte David Lloyd, Defender of Rorke's DriftFri Apr 26, 2024 8:48 pm by Julian Whybra » The curious tale of Cetshwayo's "gunpowder depot" and an aggressive snakeThu Apr 25, 2024 9:36 am by Hobbes » Anson A. Mayer/MaherTue Apr 23, 2024 7:10 pm by cmeghen » Late Father's Militaria CollectionSun Apr 21, 2024 2:16 pm by Julian Whybra » A Hungarian soldier in the Zulu War (?)Sun Apr 21, 2024 11:28 am by Eddie » Lieut. B. Pohl, No. 7 Coy 1/3 Natal Native ContingentSat Apr 20, 2024 9:26 am by SRB1965 » Alfred Fairlie Henderson photographs.Fri Apr 19, 2024 7:04 am by John Young » No. 985. PTE. EDWARD READ. 2-24 Regt. (South Wales Borders).Sun Apr 14, 2024 8:12 pm by Julian Whybra » Private Willis 2/24th Regiment his letter from South AfricaSat Apr 13, 2024 2:49 pm by 1879graves » Sickness among Crealock's menFri Apr 12, 2024 4:52 pm by Hobbes » Wheeler John Cantwell DCM, RD survivor of the Royal Horse ArtilleryTue Apr 09, 2024 5:20 pm by Kenny » Brevet Major W.R.B. ChamberlinSun Apr 07, 2024 5:44 pm by Jager1 » Private 1941 Samuel MacClue / McClune 1/24th RegimentSun Apr 07, 2024 3:11 pm by Dash » Sergeant W E Warren RA - VeteranSun Apr 07, 2024 10:50 am by DavidS » "With 6 good riflemen"Sat Apr 06, 2024 5:10 pm by Hobbes » Punch's view of Chelmsford's tactics!Wed Apr 03, 2024 5:17 pm by SRB1965 » Colonialism: A Moral LegacyMon Apr 01, 2024 11:16 am by Julian Whybra » John Robert DunnSat Mar 30, 2024 12:09 pm by 90th » An early memorial to the Prince Imperial?Sat Mar 30, 2024 10:35 am by John Young » The Poem "A Child Hero" referring to Rupert WeatherleyFri Mar 29, 2024 1:07 pm by Bongo » Writing adviceTue Mar 26, 2024 2:26 pm by Julian Whybra » Private John Scott 24th Regiment a fugitive at largeWed Mar 20, 2024 12:53 pm by Dash » Your favourite line from Zulu or Zulu DawnTue Mar 19, 2024 4:52 pm by Julian Whybra » 100,000 posts!Tue Mar 19, 2024 2:20 pm by Julian Whybra » Zulu Dawn/Zulu - New Immortals Film The Way Forward ?Sat Mar 16, 2024 2:34 pm by jgregory » Badge on 2/60th and 3/60th foreign service helmets Sat Mar 16, 2024 11:05 am by John Young » Corporal James Frowen Williams F Company. Fri Mar 15, 2024 9:08 am by Julian Whybra » British rations and moraleMon Mar 11, 2024 11:05 pm by Julian Whybra » Blue Plaque to James Egan, alias Private HaganMon Mar 11, 2024 9:16 pm by ADMIN» A few questions regarding Rorke's Drift and IsandlwanaWed Mar 06, 2024 9:16 pm by Julian Whybra » William J Hoare 24th Regiment??Sun Mar 03, 2024 7:08 pm by Dash » Swinburn Carbine issue in AZWThu Feb 29, 2024 12:53 pm by Rob D » Australians who went to Zululand and fought in the 1879 war.Thu Feb 29, 2024 8:39 am by John Young |
| April 2024 | | Mon | Tue | Wed | Thu | Fri | Sat | Sun |
|---|
| 1 | 2 | 3 | 4 | 5 | 6 | 7 | | 8 | 9 | 10 | 11 | 12 | 13 | 14 | | 15 | 16 | 17 | 18 | 19 | 20 | 21 | | 22 | 23 | 24 | 25 | 26 | 27 | 28 | | 29 | 30 | | | | | |  Calendar Calendar |
|
| Top posting users this month | |
| New topics | » The curious tale of Cetshwayo's "gunpowder depot" and an aggressive snakeWed Apr 24, 2024 3:26 pm by Hobbes » Lieut. B. Pohl, No. 7 Coy 1/3 Natal Native ContingentSat Apr 20, 2024 12:38 am by WeekendWarrior » Alfred Fairlie Henderson photographs.Fri Apr 19, 2024 7:04 am by John Young » Late Father's Militaria CollectionThu Apr 18, 2024 3:04 pm by A Crockart » Anson A. Mayer/MaherTue Apr 16, 2024 5:28 pm by cmeghen » A Hungarian soldier in the Zulu War (?)Sun Apr 14, 2024 8:01 pm by Hobbes » Sickness among Crealock's menThu Apr 11, 2024 8:51 pm by Hobbes » Wheeler John Cantwell DCM, RD survivor of the Royal Horse ArtillerySun Apr 07, 2024 9:36 pm by Hobbes » John Robert DunnSat Mar 30, 2024 11:47 am by SueSNB |
| Zero tolerance to harassment and bullying. | |
Due to recent events on this forum, we have now imposed a zero tolerance to harassment and bullying. All reports will be treated seriously, and will lead to a permanent ban of both membership and IP address.
Any member blatantly corresponding in a deliberate and provoking manner will be removed from the forum as quickly as possible after the event.
If any members are being harassed behind the scenes PM facility by any member/s here at 1879zuluwar.com please do not hesitate to forward the offending text.
We are all here to communicate and enjoy the various discussions and information on the Anglo Zulu War of 1879. Opinions will vary, you will agree and disagree with one another, we will have debates, and so it goes.
There is no excuse for harassment or bullying of anyone by another person on this site.
The above applies to the main frame areas of the forum.
The ring which is the last section on the forum, is available to those members who wish to partake in slagging matches. That section cannot be viewed by guests and only viewed by members that wish to do so. |
| Fair Use Notice | | Fair use notice.
This website may contain copyrighted material the use of which has not been specifically authorised by the copyright owner.
We are making such material and images are available in our efforts to advance the understanding of the “Anglo Zulu War of 1879. For educational & recreational purposes.
We believe this constitutes a 'fair use' of any such copyrighted material, as provided for in UK copyright law. The information is purely for educational and research purposes only. No profit is made from any part of this website.
If you hold the copyright on any material on the site, or material refers to you, and you would like it to be removed, please let us know and we will work with you to reach a resolution. |
| | | And that is the Zulu War in a Nut Shell !!!!!!!!!!!!!. |  |
| | | Author | Message |
|---|
littlehand
Posts : 7076
Join date : 2009-04-24
Age : 55
Location : Down South.
| | Subject: And that is the Zulu War in a Nut Shell !!!!!!!!!!!!!. Sun Feb 17, 2013 11:26 pm | |
| The Battle of Isandlwana
War: Zulu War
Date: 22nd January 1879
Place: 10 miles east of the Tugela River in Zululand, South Africa.
Winner: The British force was wiped out by the Zulu Army.
1st Battalion, 24th Foot, massacred at the hands of the Zulus at the Battle of Isandlwana, 22nd January 1879
Account:
The battle at Isandlwana stunned the world. It was unthinkable that a ?native? army armed substantially with stabbing weapons could defeat the troops of a western power armed with modern rifles and artillery, let alone wipe it out.
Until news of the disaster reached Britain the Zulu War was just another colonial brushfire war of the sort that simmered constantly in many parts of the worldwide British Empire. The complete loss of a battalion of troops, news of which was sent by telegraph to Britain, transformed the nation?s attitude to the war.
The Zulu War began in early January 1879 as a simple campaign of expansion. British colonial officials and the commander-in-chief in South Africa, Lord Chelmsford, considered the independent Zulu Kingdom ruled by Cetshwayo a threat to the British colony of Natal with which it shared a long border along the Tugela River.
Zulu Warriers
In December 1878 the British authorities delivered an ultimatum to Cetshwayo requiring him to give up a group of Zulus accused of murdering a party of British subjects. In the absence of a satisfactory response Chelmsford attacked Zululand on 11th January 1879.
Chelmsford?s previous wars in South Africa did not prepare him for the highly aggressive form of warfare practised by the Zulus.
The advance of Lord Chelmsford's column from Rorke's Drift on the Tugela River to Isandlwana; January 1879
Chelmsford divided his force into three columns. Colonel Evelyn Wood VC (won in the Indian Mutiny) of the 90th Light Infantry commanded the column that crossed the Tugela into the North of Zululand. Colonel Pearson of the 3rd Foot (the Buffs) commanded in the south, by the Indian Ocean coast. Colonel Glynn of the 24th Foot commanded the Centre Column, comprising both battalions of the 24th Foot, units of the Natal Native Infantry, Natal irregular horse and Royal Artillery.
H Company, 1st Battalion, 24th Foot: Wiped out by the Zulus at the Battle of Isandlwana
Chelmsford accompanied the Centre Column into Zululand on 11th January 1879, crossing the Tugela River at Rorke?s Drift. The column was to make for Ulundi, Cetshwayo?s principal kraal, joining Pearson?s southern column for the final assault. A company of the 2nd Battalion, 24th Foot, remained at Rorke?s Drift, the advanced base for the column.
The Centre Column carried all its supplies in ox carts, each pulled by a team of up to 20 oxen, walking at a slow deliberate pace. A considerable part of the day was devoted to feeding and caring for the oxen. The country was hilly scrubland without roads and progress was painfully slow. Hilltops had to be picketed and the country scouted carefully for Zulus in ambush. Movement was further hampered by heavy rain causing the rivers and streams to swell and deepen.
The 24th Foot vainly attempt to resist the Zulu Army at Isandlwana. Over the scene looms the ominous shape of Isandlwana Hill
Chelmsford?s original plan had envisaged 5 columns crossing the Tugela. Shortage of troops forced him to reorganise his force into the 3 columns. Chelmsford required the original Number 2 Column under Colonel Durnford, a Royal Engineers officer with considerable experience in commanding irregular South African troops, to act in conjunction with Glynn?s Centre Column.
Chelmsford resolved to head for Isandlwana Hill. Isandlwana can be seen from Rorke?s Drift, a distinctive shape some 10 miles into Zulu country that the British troops likened to a Sphinx or a crouching lion. The proximity of this strange feature adds substantially to the macabre aura that hangs over the battle.
In the face of the invasion Cetshwayo mobilised the Zulu armies on a scale not seen before, possibly some 24,000 warriors. The Zulu force divided into two, one section heading for the Southern Column and the remainder making for Chelmsford?s Centre Column.
Lord Chelmsford's column arrives at Isandlwana.
The Centre Column reached Isandlwana on 20th January 1879 and encamped on its lower slopes.
On 21st January 1879 Major Dartnell led a mounted reconnaissance in the direction of the advance. He encountered the Zulus in strength. Dartnell?s command was unable to disengage from the Zulus until the early hours of 22nd January 1879.
Receiving Dartnell?s intelligence Chelmsford resolved to advance against the Zulus with a sufficient force to bring them to battle and defeat them. 2nd Battalion, 24th Foot, the Mounted Infantry and 4 guns were to march out as soon as it was light.
Dabulamanzi: the Zulu general who led the attack on the British at Isandlwana
Colonel Pulleine was left in camp with the 1st Battalion of the 24th Foot. Orders were sent to Colonel Durnford to bring his column up to reinforce the camp.
Early on the morning of 22nd January 1879 Chelmsford advanced with his force and joined Dartnell. The Zulus however had disappeared. Chelmsford?s troops began a search of the hills.
The Zulus had bypassed Chelmsford and moved on Isandlwana. The first indication in the camp that there was likely to be a Zulu threat came when parties of Zulus were seen on the hills to the north east and then to the east.
Lieutenants Melville and Coghill escape with the Queen's Colour of the 24th Foot
Colonel Pulleine, the officer in command in the camp, ordered his command to form to the east, the direction in which the Zulus had appeared. Pulleine dispatched a message to Chelmsford warning him that the Zulus were threatening the camp. At about 10am Colonel Durnford arrived at Isandlwana with a party of mounted men and a rocket troop.
Durnford promptly left the camp to follow up the reports of the imminence of the Zulus and Pulleine agreed to support him if he found himself in difficulties. Captain Cavaye?s company of the 1st/24th was placed in picquet on a hill to the North. The remainder of the troops in camp stood down.
On the heights, Durnford?s mounted troops spread out and searched for the Zulus. One troop of mounted volunteers pursued a party of Zulus as they retired until suddenly out of a fold in the ground the whole Zulu army appeared.
The Zulus were forced to act by the sudden appearance of the mounted volunteers and advanced in some confusion, shaking out as best they could into the traditional form of assault: the left horn, the central chest of the attack and the right horn.
One of Durnford?s officers rode back to Isandlwana to warn the camp that it was about to be attacked.
Pulleine had just received a message from Chelmsford ordering him to break camp and move up to join the rest of the column. On receipt of Durnford?s message Pulleine deployed his men to meet the crisis.
It is thought that neither Pulleine nor any of his officers appreciated the scope of the threat from the Zulus or the size of the force that was descending on them. Pulleine acted as if the only need was to support Durnford. He sent a second company under Captain Mostyn to join Captain Cavaye?s on the hill and 2 guns were moved to the left of the camp with companies of foot to support them.
As the Zulus advanced Durnford?s rocket troop was overwhelmed and the equipment taken, the Royal Artillery crews managing to escape. The main Zulu frontal assault now appeared over the ridge and Mostyn?s and Cavaye?s companies hastily withdrew to the camp, pausing to fire as they went.
Pulleine?s battalion, drawn up in front of the camp at the base of the ridge, opened fire on the advancing Zulus of the ?chest?, who found themselves impeded by the many dongas, or gullies, in their path and eventually went to ground.
The danger to the British line was presented by the Zulu ?horns? which raced to find the end of the British flank and envelope it.
On the British right the companies of the 24th and the NNI were unable to prevent this envelopment. In addition the Zulus were able to infiltrate between the companies of British foot and the irregulars commanded by Durnford.
British troops escaping from the Zulus across the Tugela
It is said that a major problem for the British was lack of ammunition and failings in the system of re-supply. It seems that this was not so for the 24th. However Durnford?s men on the extreme right flank did run out of ammunition and were forced to mount up and ride back into the camp, thereby leaving the British flank open.
The Zulu chiefs took this opportunity to encourage the warriors of the ?chest?, until now pinned down by the 24th?s fire, to renew their attack. This they did causing the British troops to fall back on the encampment.
A Zulu regiment rushed between the withdrawing British centre and the camp and the ?horns? broke in on each flank The British line quickly collapsed.
As the line broke up, groups formed and fought the Zulus until their ammunition gave out and they were overwhelmed. A section of Natal Carbineers commanded by Durnford is identified as giving a heavy fire until their ammunition was spent. They fought on with pistols and knives until they were all struck down.
The ?horns? of the Zulu attack did not quite close around the British camp, some soldiers managing to make their way towards Rorke?s Drift. But the Zulus cut the road and the escaping soldiers from the 24th were forced into the hills where they were hunted down and killed. Only mounted men managed to make it to the river by the more direct route to the south west.
The Zulus attack the British Camp at Isandlwana
A group of some 60 soldiers of the 24th Foot under Lieutenant Anstey, were cornered on the banks of a tributary of the Tugela and wiped out.
The last survivor in the main battle, a soldier of the 24th, escaped to a cave on the hillside where he continued fighting until his ammunition gave out and he was shot down.
The final act of the drama was played out along the banks of the Tugela River. Numbers of men were caught there by the Zulus. It is thought that natives living in Natal came down to the river and on the urgings of the Zulus killed British soldiers attempting to escape.
The Colour Party of the 1st/24th Foot prior to presenting the Queen's Colour recovered from the Tugela River after the Battle of Isandlwana to HM Queen Vicftoria. The Queen's Colour is on the left. The soldiers on the far right and fourth from the right fought at Rorke's Drift.
The most memorable episode of this stage of the battle concerns Lieutenants Melville and Coghill. Melville was the adjutant of the 1st Battalion, the 24th Foot. He is thought to have collected the Queen?s Colour from the guard tent towards the end of the battle and ridden out of camp heading for the Tugela River. Melville arrived at the river, in flood from the rains, with and plunged in. Half way across Melville came off his horse, still clutching the cased colour. Coghill, also of the 24th Foot, crossed the river soon after and went to Melville?s assistance. The Zulus were by this time lining the bank and opened a heavy fire on the two officers. Coghill?s horse was killed and the colour swept away. Both officers struggled to the Natal bank where it seems likely that they were killed by Natal natives.
Melville and Coghill probably died at around 3.30pm. At 2.29pm there was a total eclipsed of the sun briefly plunging the terrible battle into an eerie darkness.
Casualties:
52 British officers and 806 non-commissioned ranks were killed. Around 60 Europeans survived the battle. 471 Africans died fighting for the British. Zulu casualties have to be estimated and are set at around 2,000 dead either on the field or from wounds. The Zulus captured 1,000 rifles with the whole of the column?s reserve ammunition supply.
The death of Lieutenants Melville and Coghill after Isandlwana Follow-up:
Chelmsford?s force was unaware of the disaster that had overwhelmed Pulleine?s troops until the news filtered through that the camp had been taken. Chelmsford was staggered. He said ?But I left 1,000 men to guard the camp.?
Chelmsford?s column returned to the scene of horror at Isandlwana and camped near the battlefield.
Chelmsford?s nightmare was that the Zulus would invade Natal. In the distance the British could see Rorke?s Drift mission station burning. From that Chelmsford knew that the Zulus had crossed the Tugela.
In the longer term the British Government determined to avenge the defeat and overwhelming reinforcements were dispatched to Natal. General Sir Garnet Wolseley was sent to replace Lord Chelmsford, arriving after the final battle of the war. Cetshwayo?s overwhelming success at Isandlwana secured his ultimate downfall.
21st May 1879: Chelmsford's column returns to bury the dead from the Battle of Isandlwana and to retrieve the wagons.
Regimental anecdotes and traditions:
? Private Samuel Wassall was awarded the Victoria Cross for his conduct at the battle. Attached to the Mounted Infantry, Wassall escaped on his horse from the battle and crossed the Tugela. He then saw a comrade from the Mounted Infantry struggling in the water. Wassall recrossed the river, tethered his horse, swam over to the soldier and dragged him ashore on the Zulu side. The two men plunged back into the Tugela and swam to safety on Wassall?s horse as the Zulus came up.
? The Queen?s colour of the 1st Battalion, 24th Foot, was recovered from the Tugela. The colour was presented to Queen Victoria who placed a wreath of silver immortelles on the tip of the staff. Lieutenants Melville and Coghill were awarded posthumous Victoria Crosses.
The Battle of Rorke's Drift
War: Zulu War
Date: 22nd January 1879
Place: Tugela River in Natal Province, South Africa
Winner: The British.
The defence of Rorke's Drift at the height of the battle
Rorke's Drift: the mealie bag wall; the burning hospital in the background
Account:
Rorke?s Drift is an iconic battle for Britain like Isandlwana, but for the reverse reason. After the disastrous and apparently inexplicable slaughter of the 1st Battalion, the 24th Foot, Bromhead?s B Company, 2nd Battalion of the same regiment with their colleagues restored the prestige of British arms by their successful defence of the mission station.
Just as it was incomprehensible to the public in Britain that 1,000 British infantry armed with modern breach loading rifles could be overwhelmed by native troops armed principally with stabbing spears, it was astounding that a handful of the same troops could withstand the overwhelming attack delivered against the mission station the next day.
Rorke's Drift: defending the biscuit box wall
On 11th January 1879, Lord Chelmsford led the Centre Column of his invading army into Zululand, crossing the Tugela River at Rorke?s Drift. On 22nd January 1879, the Zulu Army sidestepped Chelmsford?s advancing force and wiped out the troops he had left at his advanced camp by the hill of Isandlwana, principally the 1st Battalion, 24th Foot under Colonel Pulleine.
Cetshwayo, the Zulu King, when he dispatched his army to fight Chelmsford?s invading columns, issued orders that his warriors were not to enter the British colony of Natal. He still hoped to negotiate a peaceful settlement of the war and did not wish to be labeled an aggressor.
As the battle at Isandlwana drew to a close several Zulu regiments under Cetshwayo?s younger brother, Prince Dabulamanzi kaMapande, reached the Tugela River, cutting off the few escaping British. These regiments had not been involved in the battle and looked for a way to join in the success. Dabulamanzi, an aggressive leader, resolved to lead these Zulu regiments to the further triumph of capturing the British base at the Rorke?s Drift crossing on the Tugela.
A single company of infantry garrisoned the mission station at Rorke?s Drift, B Company, 2nd Battalion, 24th Foot. Although the 24th was designated the South Warwickshire Regiment, this company was manned largely by Welshmen. The company colour sergeant was Frank Bourne; the sole officer, Lieutenant Gonville Bromhead. The mission belonged to the Reverend Otto Witt, a Swede. Mr Witt?s church had been turned into a store by the British Army; his house a military hospital under Surgeon James Reynolds.
Lieutenant John Chard, Royal Engineers, arrived at Rorke?s Drift on 19th January 1879 with a party of sappers. Chard had cause to journey up to Isandlwana immediately before the battle and on his return saw groups of Zulus.
On 21st January 1879 the garrison heard firing from the distant battle and a group of officers climbed the nearby hill. They saw what they eventually realised to be parties of Zulus advancing towards the mission station. News of the disaster at Isandlwana was confirmed by the arrival of Lieutenant Ardendorff from the camp.
Lieutenant Bromhead VC, 24th Foot
The British garrison set to fortifying the mission station. Tents were struck and stored and the buildings loopholed for defence. The store (church) and building (Witt?s house) were linked by walls of mealie bags.
The defence of Rorke's Drift.
A party of Durnford?s unit arrived and was posted forward to hold the Zulu advance as long as possible.
At 4.20pm firing was heard from the hill and the men of Durnford?s unit returned to the mission station and then left for Helpmakaar, the nearest Natal town. The company of Natal Native Infantry also left, leaving the regular British troops and some Natal irregulars.
The garrison hurriedly built a shorter perimeter line of biscuit boxes to accommodate the greatly reduced numbers of soldiers.
500 Zulus appeared around the hill to the South, running towards the mission station. They were met by a heavy fire from the garrison and at some 50 yards from the wall veered around the hospital to attack from the North West. They were driven back by the fire from the garrison and went to ground in the undergrowth, uncleared due the shortage of time.
The main body of Zulus came up and opened a heavy fire on the British from cover around the West and North West of the mission station.
Zulu Warrier
The hospital at the western end of the fortifications became the focus for the fighting. Set on fire and stormed by the Zulus, it became untenable. As many men were extracted as possible, the remaining patients perishing in the flames. Privates John Williams, Henry Hook, William Jones, Frederick Hitch and Corporal William Allen all received the Victoria Cross for their defence of the hospital building, fighting with bayonets once their ammunition was expended, as they contested every room with the attacking warriors.
The fighting now concentrated on the wall of biscuit barrels linking the mission house with the mealie wall. As night fell the British withdrew to the centre of the station where a final bastion had been hastily assembled. The light from the burning hospital assisted the British in their fire. The savage Zulu attacks were resisted until around midnight when unexpectedly the ferocity of the assault fell away. Firing continued until around 4am when the Zulus withdrew. By then the British held only the area around the storehouse.
The final redoubt
At 7am a body of Zulus appeared on the hill, but no attack followed. It became apparent that the Zulus could see Chelmsford?s column approaching from the direction of Isandlwana. The Zulus turned and left.
Soon afterwards the column arrived at the drift and crossed the Tugela, marching up to the mission station. Chelmsford?s delight at finding the garrison alive and still resisting was heavily tempered by his despair at finding that no survivors from Isandlwana had escaped to Rorke?s Drift.
Casualties: Zulu casualties are thought to have been around 500. The garrison of the mission station comprised 8 officers and 131 non-commissioned ranks. Of these 17 were killed and 10 wounded.
B Company, 2nd Battalion, 24th Foot: Defenders of the Mission Station at Rorke's Drift
Follow-up:
The defeat at Isandlwana brought Lord Chelmsford?s Centre Column back to the Tugela. Chelmsford had then to ensure that the Zulu Armies did not invade Natal. He called for substantial reinforcements and got them. In March 1879 Colonel Evelyn Wood?s Northern Column inflicted a heavy defeat on the Zulus at Khambula. In April 1879 Chelmsford relieved Colonel Pearson?s Southern Column, entrenched for some months at Eshowe, and later renewed the advance from the Tugela. On 4th July 1879 Cetshwayo?s Zulu Army was utterly defeated at the Battle of Ulundi. Fighting continued in a desultory form until Cetshwayo?s capture on 28th August 1879 and the end of the war.
Regimental anecdotes and traditions:
[*]Lieutenants Chard and Bromhead were each awarded the Victoria Cross for the defence of the Rorke?s Drift mission station and promoted major.
[*]In addition to the soldiers of the 24th who distinguished themselves in the defence of the hospital, Victoria Crosses were awarded to Surgeon Reynolds, Commissary Dalton and Corporal Schiess of the NNC. Colour Sergeant Bourne and Private William Roy of the 24th Foot, Gunner Cantwell of the Royal Artillery and Corporal Attwood of the Army Service Corps were awarded the Distinguished Conduct Medal.
[*]Sir Garnet Wolseley, taking over as Commander-in-Chief from Lord Chelmsford, was unimpressed with the awards made to the defenders of Rorke?s Drift, saying ?it is monstrous making heroes of those who shut up in buildings at Rorke?s Drift, could not bolt, and fought like rats for their lives which they could not otherwise save.?
[/list]
Lieutenant Chard VC, Royal Engineers
The medical consequences of the battle: It seems likely that a number of the defenders of Rorke?s Drift subsequently suffered from what is now classified as Post Traumatic Stress Disorder: Corporal Schiess fell ?on hard times? and died in 1884 aged 28 years; Pte John Fielding?s hair is said to have turned white shortly after the battle; William Jones in old age suffered from nightmares that the Zulus were about to attack; Robert Jones shot himself in 1896.
The Battle of Khambula
War: Zulu War
Date: 29th March 1879
Place: Northern Zululand in South Africa.
Winner: The British.
The Zulu attack at the Battle of Kambula
Account:
The battle of Khambula helped to recapture the initiative for the British in the war against the Zulus, following the disaster at Isandlwana.
Colonel Evelyn Wood VC?s Number 4 Column, the most northerly British force, invaded Zululand on 6th December 1879. The Zulus in the area were of the abaQulusi, vigorously loyal to Cetshwayo the Zulu King. The abaQulusi, led by the enterprising Prince Mbilini waMswati, held a group of mountains of which Hlobane was the most prominent.
Wood was accompanied by Lieutenant Colonel Redvers Buller, one of the most energetic leaders of irregular South African horse. (Buller became one of Britain?s generals in the Second Boer War: in this respect Britain?s experience was much the same as France?s; highly vigorous and successful colonial small war commanders were found wanting when required to command large formations in set piece wars). On 20th January 1879, Wood dispatched Buller with a mounted force to reconnoitre the Zulu positions. After a running skirmish Buller was forced to retire.
Colonel Redvers Buller VC
On 21st January 1879, Wood?s force marched out of camp and moved swiftly on the Zulu positions, forcing the Zulus to withdraw onto Hlobane. Wood?s troops camped and on 23rd January 1879 Wood began his attack on Hlobane. In the early hours of the morning the column received the news of Isandlwana, the destruction of Chelmsford?s camp and the loss of nearly a full battalion of British troops.
It was immediately apparent to Wood that the whole Zulu army that had fought at Isandlwana might well attack his column. He abandoned the operation and decided to move north to a new camp site at Khambula, further away from the main Zulu army.
The British column encamped on a plateau at Khambula, the ground sloping away on two sides. The troops fortified the camp with wagon walls and trenches. An earthwork bastion was built on a small hill in the middle of the camp. A further laager was built to house the cattle and oxen.
No Zulu attack materialised and the energetic Wood returned to harassing the local Zulus.
On 1st February 1879, Buller carried out another raid on Hlobane.
Over the next weeks the Zulus raided north into the areas occupied by Boer farms and villages while the British raided the Zulu areas.
On 12th March 1879, the Zulus visited another disaster on the British Army. A supply train of wagons and oxen was trapped, as it approached Luneburg, by the rising Ntombi River in the North of Zululand. Captain Moriarty, commanding the escort of a company of the 80th Regiment, formed the wagons into a V shaped defensive position, the apex facing away from the river, while the column waited for the flooding river to subside sufficiently to be crossed.
On the morning of 12th March 1879, a force of some 800 Zulus, commanded by Mbilini, attacked the camp, approaching to within 50 yards unseen due to the morning mist. Moriarty and 60 of his men were killed. A party of the 80th on the south bank, fired on the Zulus and retreated, pursued for some distance until the Zulus returned to despoil the train.
Sergeant Anthony Booth, commanding the detachment, was awarded the Victoria Cross, while his officer was tried by court martial for abandoning his men, by riding off to Luneburg to bring up reinforcements.
The Ntombi massacre prompted Evelyn Wood finally to launch his attack on Hlobane Hill. In addition Lord Chelmsford, preparing to march to the relief of Colonel Pearson?s column in its fortified camp at Eshowe near the coast in Southern Zululand, needed Wood to provide a diversion in the North.
Information came that Cetshwayo, the Zulu King, was preparing to advance on Wood?s force.
Nevertheless on 27th March 1879 Colonels Buller and Russell left Khambula with 700 and 250 mounted troops each, the plan being to attack either end of Hlobane.
The climb to the long plateau of the hill was steep. Far from being surprised the Zulus who knew the area intimately intended to trap Buller?s raiding force.
In addition Wood?s diversionary tactics proved devastatingly effective. The main Zulu Army, dispatched north by Cetshwayo, arrived at Hlobane during the course of Buller?s raid. The British force was chased along the plateau and escaped, suffering heavy casualties, just before the trap closed on it. Buller lost 12 officers and 80 men. An unrecorded number of native irregulars were killed.
The disastrous failure of the Hlobane attack adversely affected the morale of the rest of Wood?s column, many of the remaining natives and Boer volunteers leaving the camp for home.
The newly arrived Zulu Army, commanded by Chief Mnyamana Buthelezei, moved on towards Kambula in battle formation; the mass of warriors forming the ?chest? with other columns as the left and right ?horns?, ready to envelope the British, and camped ready for battle the next day.
This time the British, while in low morale after Isandlwana and the defeat of Buller?s attack on Hlobane, were ready and in compact formation behind fortifications, unlike Pulleine?s force at Isandlwana.
British patrols, out early in the morning, brought in a Zulu defector with the information that the camp was to be attacked at midday and the news that the Zulu Army could be seen approaching.
The main fortification of the camp was the wagon lager, the wagons end to end in a square with additional fortification from heaps of turf and mealie bags and an entrenchment.
The cattle were held in a square of wagons on a raised area of the plateau. In the centre of the camp area stood the earthwork redoubt built on a knoll.
As soon as the Zulu approach was reported the troops assembled at their positions, 1,200 men of the 1st/13th Light Infantry and the 90th Regiment with 800 other men; ammunition reserves established along the rear of the line.
Wood?s artillery comprised 4 seven pounder guns, 2 mule borne guns and several rocket troughs. The mule guns took post in the redoubt while the seven pounders stood in the open ground between the two main fortifications.
The Zulu formation paused for a time while final arrangements for the attack were made. It may be that the Zulu generals wished to avoid a direct assault on the British camp; Cetshwayo?s instructions had been not to repeat the mistake of Rorke?s Drift but to threaten the Natal border and try to lure Wood?s force into the open. If this is so the Zulu warriors themselves were in no mood to shun a direct attack. The Zulu Army began to move towards the British with increasing speed, the horns spreading out to the left and right flanks, the chest heading straight for the camp. The battle began at around 1.30pm.
The left horn disappeared from view as it moved into the valley to the South of the camp, where it was held up by marshy ground. The right horn circled round to the North and came in towards the camp.
Wood dispatched Buller with his mounted men to provoke the right horn into making a premature attack before the other sections of the Zulu Army were in place. Buller?s move had the effect intended, the mass of the right horn rushing towards the camp.
Buller?s troops rode hard back into the camp, several men having considerable difficulty getting away from the fast moving mass of Zulu warriors.
The 90th Light Infantry on parade in Indian before leaving for the Zulu War
Once the mounted men were clear, the troops along the north face, the 90th Light Infantry, opened fire with the guns positioned in the open between the wagon laager and the redoubt. The storm of fire destroyed the right horn as a threat to the camp, the Zulu survivors rushing back to cover some 600 yards back and staying there. This left Wood free to deploy a significant number of the troops and guns from the north side against the chest and left horn as they came up.
Hurried by the sound of firing, the left horn climbed the south face of the hill, out of sight of the British troops. Once they appeared on the crest of the hill the 13th Regiment opened a devastating fire but the Zulus were able to mount an attack on the cattle laager, forcing Wood to withdraw its garrison, leaving the laager to the Zulus.
Wood ordered Major Hackett of the 90th to take 2 companies to the crest of the valley and fire down into the Zulus assembling below. This enterprise had to be abandoned in the face of heavy Zulu fire, using Martini Henry rifles captured at Isandlwana, from the cattle laager and a hill to the West of the camp, although the left horn was temporarily halted. Hackett was blinded and one of his subalterns mortally injured.
The left horn and the chest attempted attacks on the camp from various points around the perimeter from the south to the north-east, all driven back by the heavy fire from the 2 infantry regiments and the guns of the Royal Artillery: the 2 mule guns in the redoubt and the 4 seven pounders deployed in the open ground between the wagon laager and the redoubt.
At 5.30pm the Zulus began to fall back. Wood ordered companies of infantry forward to fire into the withdrawing Zulu regiments.
Wood then unleashed Buller?s mounted men in pursuit of the increasingly disordered Zulu retreat. Enraged by the defeat of the previous day on Hlobane and the slaughter at Isandlwana the horsemen killed the fleeing Zulus during the pursuit that continued over many miles.
British foot patrols sought out Zulus lying wounded around the camp and killed many of them.
Under the pressure of the defeat and subsequent pursuit, the Zulu Army collapsed, many of the warriors heading for their homes.
Casualties: Wood?s force suffered 83 casualties. It is believed that 3,000 Zulus were either killed in the battle or died of wounds.
Follow-up: The battle at Khambula significantly reduced the ability of the Zulus to resist the British invasion of Cetshwayo?s Zululand kingdom. The diversion of such a large force of warriors to the North enabled Chelmsford to relieve Pearson at Eshowe in the South and then press forward to the final defeat of the Zulus at Ulundi.
Regimental anecdotes and traditions:
? The soldiers of the 13th and 90th Regiments expended an average of 31 rounds per man.
? Wood appears to have considered the role of the Royal Artillery guns as decisive in the battle, firing shrapnel over longer ranges and case shot at short into the massed Zulu ranks.
The Battle of Gingindlovu
War: Zulu War
Date: 2nd April 1879
Place: Eastern Zululand in South Africa
Winner: the British
The Battle of Gingindlovu; the British square attacked by the Zulus; 91st Highlanders and a Gatling Gun
Account:
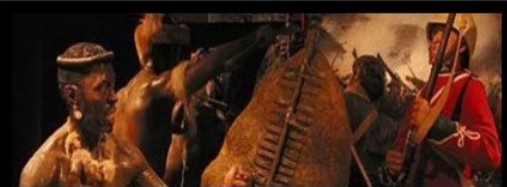
The Zulu War was among the most savage of Britain?s colonial wars: Isandlwana saw the massacre of a battalion of British infantry (1st Battalion, 24th Foot): At Rorke?s Drift 140 British troops slew 500 Zulus with their breech loading rifles, firing from inside the fortified post. At Khambula, Evelyn Wood?s column killed 2,000 Zulus with its volley fire and probably mortally wounded a further 1,000.
At the end of March 1879 Colonel Pearson?s Number 1 Column lay isolated in a fortified position at Eshowe deep in eastern Zululand. Lord Chelmsford?s desperate worry was that this force would succumb before he could relieve it.
Following the disaster of Isandlwana, the British government rushed reinforcements to Natal: 2 regimens of cavalry, 2 batteries of Royal Artillery and 5 battalions of Foot.
On 29th March 1879 Chelmsford?s column crossed the Tugela River and began its march to the relief of Pearson?s force. The country was covered by Zulu scouts and signals flashed from Pearson?s camp at Eshowe. It was clear to Chelmsford that his advance would be fiercely contested, progress further impeded by the terrible weather.
British troops crossing the Tugela River during the advance into Zululand On 1st April 1879, Chelmsford?s column reached the Royal Kraal of Gingindlovu and laagered for the night. A heavy rain came on. Chelmsford had taken careful note of the lessons from Isandlwana. At every encampment the wagons were carefully positioned to create an unbroken laager wall and the troops required to dig sections of trench around the laager. Every camp was rendered fully defensible in case of sudden attack.
Chelmsford?s chief scout, John Dunn, a pre-war inhabitant of Zululand for many years, scouted across the Nyezane River. Beyond the river he encountered the Zulu Army, some 11,000 warriors. Dunn returned to the British camp and reported to Chelmsford that the Zulus would attack in the morning.
Chelmsford?s column was laagered on the top of a hill, the sides sloping away in each direction, as good a position as any for the battle. In accordance with the new standing orders, the laager was entrenched in a square.
Chelmsford's force advancing to relieve Eshowe
The north face of the square was held by the 3rd Battalion, the 60th Rifles; the left by the 99th Regiment and the Buffs (3rd Foot) and the right face by the 57th Regiment. The corners of the square were reinforced by Gatling Guns, conventional artillery and rocket troughs.
As the sun rose, Irregular Horse and infantry piquets patrolled towards the Nyezane River, scouting for the Zulu advance.
The regiments in the camp stood to at 4am. Shortly before 6am, reports came in from the advanced piquets of the Zulu approach. A native soldier pointed to the skyline. ?Impi? he declared. The officers stared at the hill top before realising that what they had taken to be a long smudge of vegetation was the mass of the advancing Zulu ?chest?. Zulu skirmishers opened fired from cover as they rushed forward.
A Royal Navy Gatling Gun Team
The first attack was received by the 60th Rifles. One of the newly arrived regiments, the young soldiers of the 60th found the ordeal of the Zulu attack trying in the extreme and it took all the leadership of the battalion?s officers to keep the line steady and firing, the Gatling guns at the ends of the line providing much needed support.
Under heavy fire from the British line the Zulu charge faltered and flowed around to the west flank of the square, where the attack was renewed against the 99th Regiment. In the face of the volley firing from the two sides of the square the Zulu ?chest? finally went to ground in cover.
The ?horns? of the Zulu advance rushed around the British position expecting to find the rear open, as at Isandlwana, only to meet the volley firing of the 91st Highland Regiment. Here too the Zulus were forced into cover.
The 91st Highlanders in Zululand
In the face of the sustained fire from the 91st, the attack on the rear of the laager ebbed away and Chelmsford ordered his mounted units out of the square to complete the victory. The mounted attack was premature and it was some time before the Zulu withdrawal took hold.
Soon after 7am the battle was over and the Zulus in full retreat, pursued by the mounted troops and the native contingent. Large numbers of Zulu warriors were killed in the long pursuit.
As at Khambula the Zulus wounded on the battlefield were massacred. The Zulu army was effectively dispersed.
The outcome of the battle was a great relief to Chelmsford, showing him that his army?s confidence was re-established and enabling him to continue his advance to Pearson?s camp and on to defeat the Zulu King, Cetshwayo, at the Battle of Ulundi.
Casualties: British casualties were 6 officers and 55 men; among the dead was Lieutenant Colonel Northey of the 60th Rifles. Zulu casualties were calculated at 1,000.
The Battle of Ulundi
War: Zulu War
Date: 4th July 1879
Place: Central Zululand in South Africa
Combatants: British against the Zulus
Winner: The British
Zulus attacking the 90th Regiment at the Battle of Ulundi
The Charge of the 17th Lancers at the Battle of Ulundi
A Zulu Kraal Account:
Following the battle at Gingindlovu on 2nd April 1879, Lord Chelmsford?s force advanced to the fortified camp at Eshowe and relieved Colonel Pearson?s command, entrenched there since the end of January 1879. Pearson?s men had put all their effort into building the camp in the expectation that it would be used as the advanced base for the final assault on the Zulu King, Cetshwayo?s Royal kraal at Ulundi. To the disappointment of Pearson?s men, Chelmsford ordered a retreat to the Tugela, intending to establish a base nearer to the border river.
Superficially the Zulus appeared to have thrown the British back to their starting point. But the battles of Khambula and Gingindlovu inflicted heavy casualties on the Zulus that could not be replaced. Reacting to the horror of Isandlwana the British government sent out more reinforcements than could effectively be used. Natal was awash with British major generals. Sir Garnet Wolseley and the Ashantee Ring were on their way to displace Lord Chelmsford in command.
Chelmsford by the middle of April 1879 prepared to invade Zululand again with 2 cavalry regiments (the King?s Dragoon Guards and the 17th Lancers), 5 batteries of artillery and 12 infantry battalions: 1,000 regular cavalry, 9,000 regular infantry and a further 7,000 men with 24 guns, including the first Gatling battery to take the field for the British army. The Zulus could maintain 24,000 dispirited warriors. Chelmsford re-organised his army. Evelyn Wood?s force in the West was renamed the Flying Column. The newly arrived Major General Henry Crealock, who had served with the 90th Perthshire Regiment in the Crimea, took over Pearson?s old command, now entitled the 1st Division, in the lower Tugela by the coast and a new command entitled the 2nd Division under Major General Newdigate but accompanied by Chelmsford himself prepared to invade Zululand in the central area and join up with Wood.
The British were still nervous of the Zulus, heavily influenced by the terrible events at Isandlwana. For his part Cetshwayo had lost faith in his ability to repel the British invasion. Wood began to march south from Khambula while Chelmsford prepared to cross the Tugela. There was one outstanding duty to fulfill before the army could turn its attention to defeating Cetshwayo.
Lieutenant General Lord Chelmsford
On 21st May 1879 Major General Marshall with his cavalry brigade of the 2 regular regiments moved forward to Isandlwana and undertook the task of burying the British casualties from the battle on 22nd January.
The charge of the 17th Lancers at the Battle of Ulundi
The advance of Chelmsford?s 2nd Division finally began on 1st June 1879. But the war had not finished its stock of horrors for the British. As Chelmsford sat in his tent writing dispatches a staff officer burst in to tell him of the death at the hands of the Zulus of the French Prince Imperial. In 1871 the Emperor Napoleon III of France had abdicated and retired to England where he had died. His widow, the Empress Eugenie became a great friend of Queen Victoria. Napoleon?s son Louis, the Prince Imperial, attended the Royal Military College at Woolwich. On the intercession of the Queen the Prince Imperial was permitted to accompany the army to Natal and join Chelmsford?s column. While with an advanced patrol and dismounted he was caught and killed by the Zulus. The Prince?s death caused an outcry in France. Lieutenant Carey of the 98th Regiment, nominally in charge of the patrol was tried by court martial but acquitted.
As the war continued the Flying Column and the 2nd Division met and marched towards Ulundi in parallel.
On 5th June 1879 Buller?s irregular horsemen encountered a strong force of Zulu skirmishers. After exchanges of fire it became clear that the Zulus would not give ground and Buller withdrew.
The 17th Lancers came up and, keen to establish themselves, rode down the valley looking for the Zulus. The Lancers came under fire and their adjutant was shot and killed. The whole mounted force returned to camp where the unfortunate death of the officer adversely affected the whole column.
The charge of the 17th Lancers at the Climax of the Battle of Ulundi
On 6th June 1879 a piquet caused a false alarm and the whole column rushed to take position in the entrenched area of the camp. Fire was given and some 1,200 rounds discharged before the troops could be brought under control. It was symptomatic of the nervousness these inexperienced troops felt about the Zulus.
Wolseley arrived in Cape Town on 28th June 1879 and cabled Chelmsford who replied that his two columns were within 17 miles of the Royal Kraal of Ulundi.
Cetshwayo attempted to negotiate with the British while his warriors gathered at Ulundi for the great last fight. The terms Chelmsford demanded were rejected with indignation by the Royal Council. On 30th June the Flying Column and the 2nd Division advanced into the valley of the White Mfonzi towards Ulundi. Camp was established by the river. On 3rd July 1879 Colonel Buller took his mounted men across the river to reconnoitre the Zulu position. The Zulus were waiting in ambush for Buller and his force only just escaped annihilation.
During the night the British troops were forced to listen to the Zulu war songs. For some it was an interesting experience, for others unnerving.
With reveille the next day Chelmsford took the majority of his force with only ammunition and water and crossed the river advancing towards the Zulu kraal, moving in the cumbersome hollow square, the mounted troops covering each side and the rear.
A Zulu Warrior
Just before 9am the Zulus attacked the hollow square on all sides.
The fire from the packed British regiments, the artillery and the Gatling guns was overwhelming. It was the largest concentration of British military might in South Africa to that date. Prisoners stated after the battle that they were overwhelmed by the noise of the firing, let alone the impact of the bullets, and stunned by the size of the British force. It took only half an hour before the Zulus began to falter.
Cetshwayo, King of the Zulus
At this point the 17th Lancers passed out of the back of the square and charged. The impact of the charge broke up what was left of the Zulu formations and the Zulu army dissolved in flight, pursued by the Lancers and the mounted irregular units of Chelmsford?s columns. The massacre of fleeing Zulus seen at Khambula and Gingindlovu was repeated and multiplied several times. It was the end of the Zulu army and the war, although fighting continued on a small scale for some weeks. As soon as the battle was over Chelmsford ordered his troops to burn the Royal Kraal of Ulundi. Casualties: The British casualties were 3 officers and 79 men. Zulu casualties were said to be 1,500.
Follow-up: Following the battle the British burnt the military kraals in the area around Ulundi. The Zulu chiefs began to surrender across Zululand to the British forces. Cetshwayo, the Zulu king, was captured on 28th August 1879 and taken into exile in Cape Colony. The British established a regime in Zululand considered to be sympathetic to Britain and withdrew.
Regimental anecdotes and traditions:
The Zulu War was one of the last campaigns fought by the old numbered infantry regiments of the British Army. In 1882 the Cardwell Reforms brought in the system of two battalion regiments, by combining the single battalion regiments in pairs and assigning formal regional titles. The regiments up to the 25th Foot already had two battalions and simply took the new titles. The 24th Foot, which had both its battalions in the Zulu War, fighting at Isandlwana and Rorke?s Drift, from being the South Warwickshire Regiment became the South Wales Borderers; the shift in focus from the English West Midlands to Wales being a nod to the Welsh origins of the soldiers of B Company of the 2nd Battalion who had held Rorke?s Drift.
Other arrangements were less happy. The 90th Perthshire Light Infantry, memorably raised by Sir Thomas Graham in 1794, and one of Britain?s most consistently successful regiments in the Peninsular, Crimean and many smaller colonial wars, to its horror became the 2nd Battalion of the 26th Foot, the Cameronians. The new regiment was given the formal title of the Scottish Rifles. The 2nd Battalion continued to call itself the 90th Light Infantry into the First World War and beyond. It never permitted itself to be referred to as the ?Cameronians?, a reference to the raising of the 26th Foot from the extreme Protestant supporters of Richard Cameron in 1689.
The 99th, a Scottish regiment from Edinburgh known as the ?Moonrakers?, to its surprise found itself the 2nd Battalion of the Wiltshire Regiment, a southern English county regiment. Fortunately few of the new links were as bizarre as this. In the 1960s, when the Royal Berkshire and Wiltshire Regiments were amalgamated, the new regiment was called the ?Duke of Edinburgh?s?, a title of the old 99th.
While the Cardwell Reforms created regiments more suited to colonial policing duties, one battalion of a regiment being in Britain, while the other was posted to a colony, the flexibility of the old system, in which officers moved from regiment to regiment depending on the availability of posts, was lost. The British Army still struggles to overcome the disadvantages of the 1882 arrangements.
Source:Jean Gove / British Battles |
| | | | | | And that is the Zulu War in a Nut Shell !!!!!!!!!!!!!. | |
|
Similar topics | |
|
| | Permissions in this forum: | You cannot reply to topics in this forum
| |
| |
| |